A target in Xcode stands for the thing you want to create, such as an app or a framework. In order to add a new target to your existing project in Xcode follow the below-mentioned steps to add a new target in Xcode to your existing project.
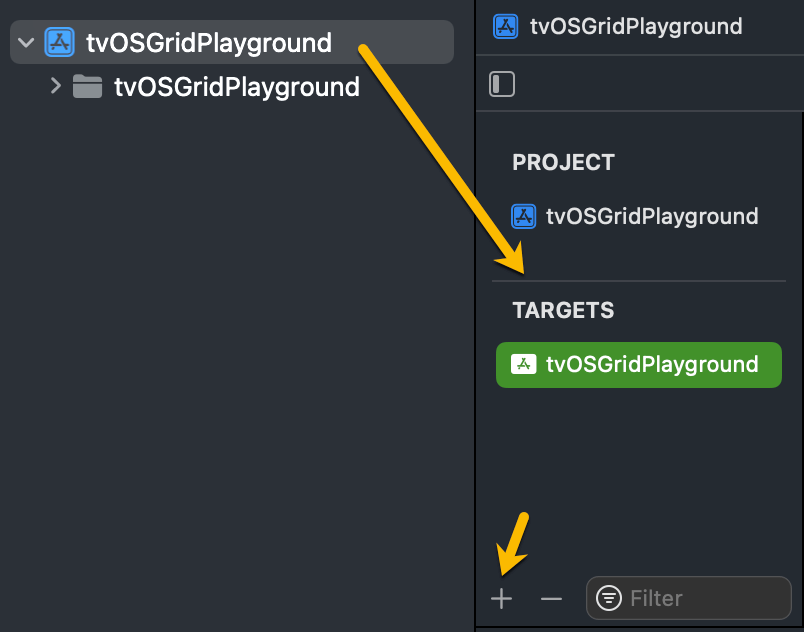
In Xcode, launch your project.
In the Project Navigator on the left side of the window, choose the project.
In the project editor’s Targets section, click the “+” button in the bottom left corner.
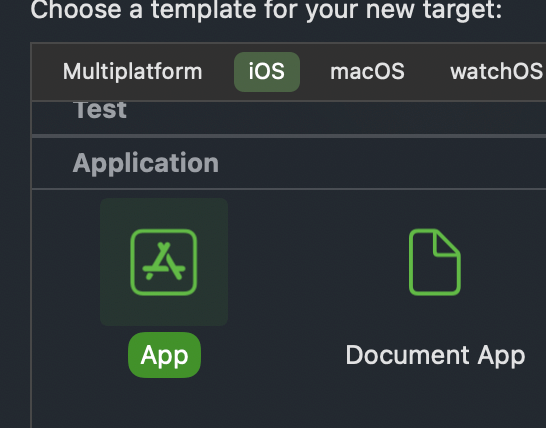
Choose the target category, such as iOS Application or macOS Application, that you want to add. If you want to add an iOS target then select the iOS target and choose App and click the Next button
Choose the necessary settings, including the deployment target, device type, and language, after entering the target’s name.
Add the Product Name and Organization Identifier and click the Finish button:

The new target will be added to your Xcode project.
You can add files to the target after it has been created by dragging them there from the Project Navigator’s Targets section.
By clicking the target in the Targets section and choosing the Construction Parameters and Build Phases tabs, you can additionally alter the target’s build settings and configurations.
If you wish to execute it from Xcode, don’t forget to go through the step again for adding the new target to your scheme.