
Verify the existing hard disk space
Verify your root partition to see how much hard disk space is left. In this example, we will be increasing the hard disk space from 8 GB to 30 GB.
Run the df -h command to get the availaible space in your system:
df -h
Filesystem      Size  Used Avail Use% Mounted on
/dev/root       7.7G  7.7G     0 100% /
devtmpfs        3.9G     0  3.9G   0% /dev
tmpfs           3.9G  4.0K  3.9G   1% /dev/shm
tmpfs           795M   79M  717M  10% /run
tmpfs           5.0M     0  5.0M   0% /run/lock
tmpfs           3.9G     0  3.9G   0% /sys/fs/cgroup
In the above output you can see that the disk is 100 full: /dev/root 7.7G 7.7G 0 100%
Run the lsblk command to list the information about all available block devices on the disk.
lsblk
NAME    MAJ:MIN RM  SIZE RO TYPE MOUNTPOINT
loop0     7:0    0   25M  1 loop /snap/amazon-ssm-agent/4046
loop1     7:1    0 26.7M  1 loop /snap/amazon-ssm-agent/5163
loop2     7:2    0 67.2M  1 loop /snap/lxd/21835
loop3     7:3    0 67.8M  1 loop /snap/lxd/22753
loop4     7:4    0 61.9M  1 loop /snap/core20/1405
loop5     7:5    0 61.9M  1 loop /snap/core20/1242
loop6     7:6    0 43.6M  1 loop /snap/snapd/15177
loop7     7:7    0 55.5M  1 loop /snap/core18/2253
loop8     7:8    0 55.5M  1 loop /snap/core18/2344
xvda    202:0    0    8G  0 disk
└─xvda1 202:1    0    8G  0 part /
From the above results we can see that the total space for our disk is 8GB.
Exand hard disk through AWS console
Create a snapshot
Go to AWS Console dasboard.
Go to Elastic Block Store >> Volumes section.
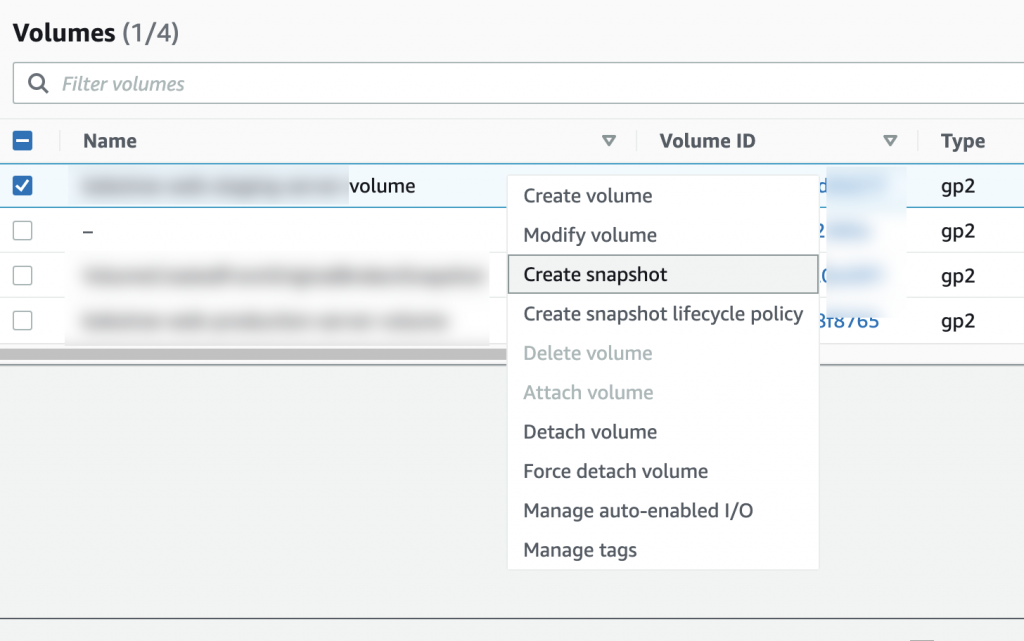
Right click your volume in Volumes pane and click Create snapshot option:
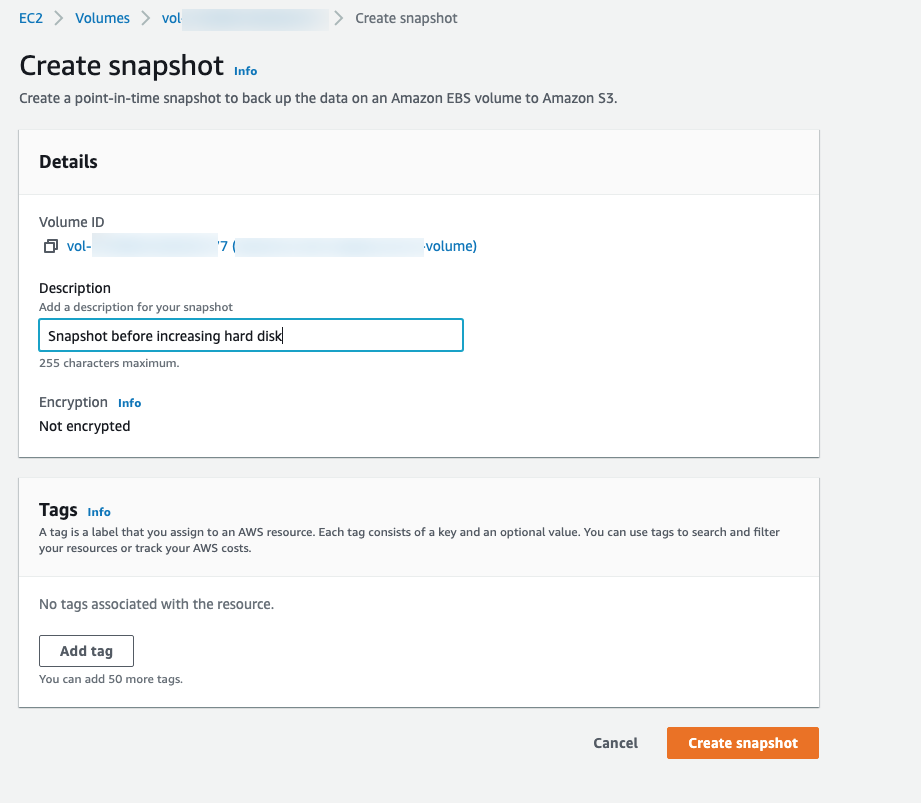
On the Create snapshot page enter the description for your snapshot.
After clicking Creating snapshot, the snapshots list will show the the snapshot it is working on. Initially it will show you the Pending status.

When the snapshot is done it will show the Completed status.

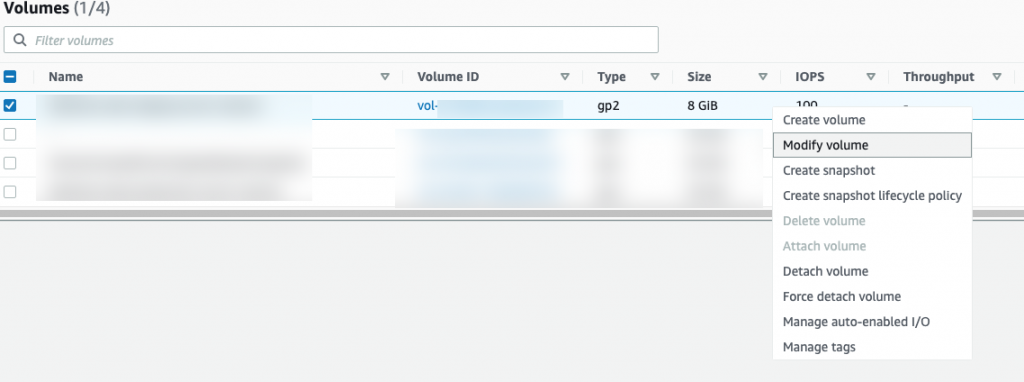
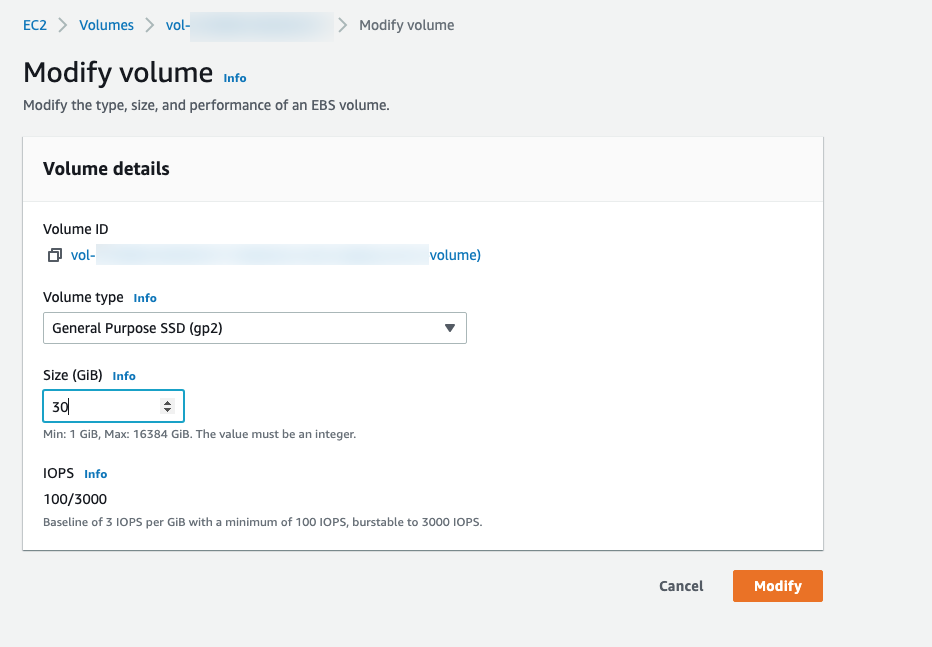
Lett’s go back to Volumes section again and click Modify volume by right clicking the volume which we want to expand.
On the Modify volume page, enter the amount hard disk which top which you want the disk to be expanded. 30 GB, for example in our case.
It will prompt you the following message telling that you will be start getting charged for the expanded disk:
If you are increasing the size of the volume, you must extend the file system to the new size of the volume. You can only do this when the volume enters the optimizing state.
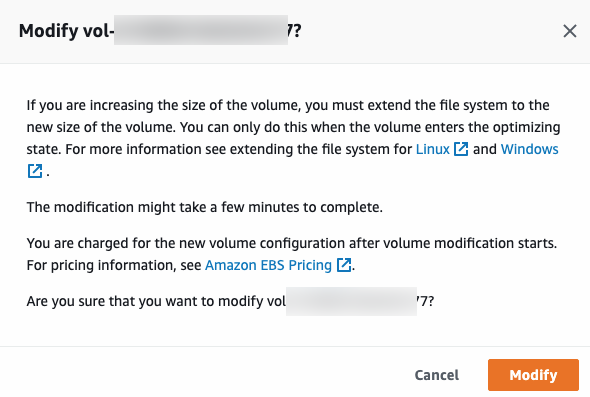
Click Modify button.
On the Volume list page it will show the progress of Volume state.

Expanding volume can take lot of time depending upon the size you are expanding to. When the disk is expanded it will give you the Okay status.

Expand the partition in Ubuntu
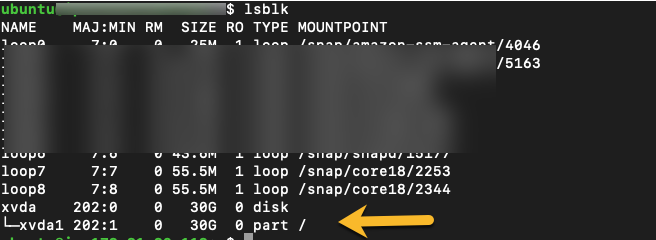
Run the lsblk command:
lsblk
Output:
xvda 202:0 0 30G 0 disk
└─xvda1 202:1 0 8G 0 part /
You can confirm from the above results that disk has been increased to 30 GB from 8 GB but the usable disk still needs to be exanded to 30 GB.
Clear tmp folders:
sudo mount -o size=10M,rw,nodev,nosuid -t tmpfs tmpfs /tmp
Run growpart command to expand the disk
sudo growpart /dev/xvda 1
Output:
CHANGED: partition=1 start=2048 old: size=16775135 end=16777183 new: size=62912479 end=62914527
Run the lsblk command again:
lsblk
Output:
xvda 202:0 0 30G 0 disk
└─xvda1 202:1 0 30G 0 part /
Enlarge the unmounted file system located on device.
sudo resize2fs /dev/xvda1
Output:
resize2fs 1.45.5 (07-Jan-2020)
Filesystem at /dev/xvda1 is mounted on /; on-line resizing required
old_desc_blocks = 1, new_desc_blocks = 4
The filesystem on /dev/xvda1 is now 7864059 (4k) blocks long.
resize2fs 1.45.5 (07-Jan-2020)
Filesystem at /dev/xvda1 is mounted on /; on-line resizing required
old_desc_blocks = 1, new_desc_blocks = 4
The filesystem on /dev/xvda1 is now 7864059 (4k) blocks long.
Verify your root partition again:
df -h
Output:
Filesystem      Size  Used Avail Use% Mounted on
/dev/root        30G  6.8G   23G  24% /
devtmpfs        3.9G     0  3.9G   0% /dev
tmpfs           3.9G  4.0K  3.9G   1% /dev/shm
tmpfs           795M  856K  795M   1% /run
tmpfs           5.0M     0  5.0M   0% /run/lock
tmpfs           3.9G     0  3.9G   0% /sys/fs/cgroup
/dev/loop0       25M   25M     0 100% /snap/amazon-ssm-agent/4046
/dev/loop1       27M   27M     0 100% /snap/amazon-ssm-agent/5163
/dev/loop2       68M   68M     0 100% /snap/lxd/21835
/dev/loop3       68M   68M     0 100% /snap/lxd/22753
/dev/loop4       62M   62M     0 100% /snap/core20/1405
/dev/loop5       62M   62M     0 100% /snap/core20/1242
/dev/loop6       44M   44M     0 100% /snap/snapd/15177
/dev/loop7       56M   56M     0 100% /snap/core18/2253
/dev/loop8       56M   56M     0 100% /snap/core18/2344
tmpfs           795M     0  795M   0% /run/user/1000
tmpfs            10M     0   10M   0% /tmp
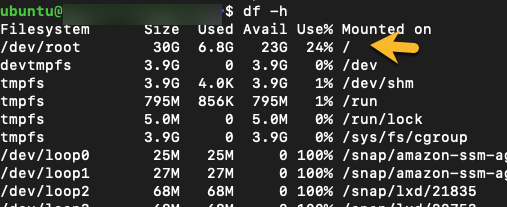
The disk is finally ready with the expanded space.